
Vent for chicken coop
I’ve raised laying hens through blazing summers, icy winters, and a few storms that tried to blow the roof off my barn. If there’s one quiet little thing that decides whether your flock thrives or struggles, it’s this: the right vent for chicken coop, in the right place, working every single day.
Let me walk you through how I think about coop ventilation on my own farm, with simple words, honest stories, and a few lessons I learned the hard way so your birds don’t have to.
The first time I built a coop, I worried more about drafts than fresh air. I sealed that little house up so tight you’d think I was storing gold in there. Well, the hens let me know I’d made a mistake. Frosty combs in winter, damp bedding, and that sharp ammonia smell when I opened the door. That’s when I truly understood what a proper vent for chicken coop is supposed to do: move moist, dirty air out without chilling the birds.
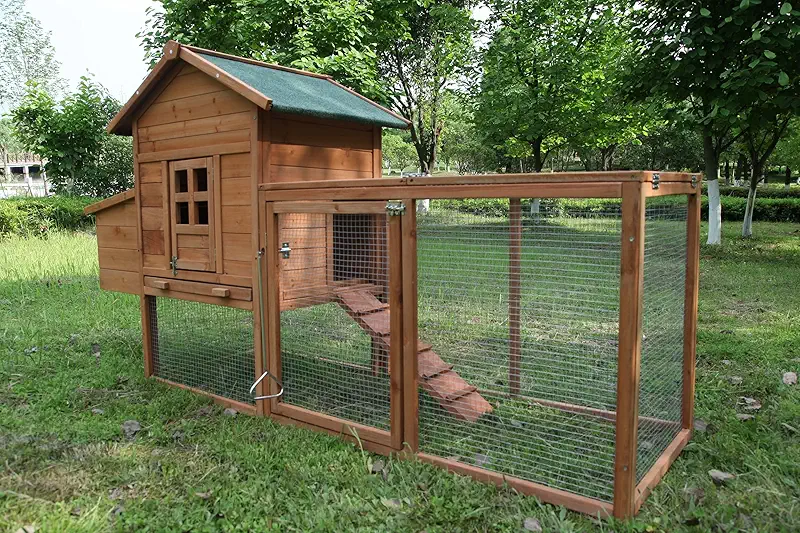
Over the years I’ve tried just about every kind of vent: fixed gable vents, little sliding vents, ridge vents, roof vents, and even a few homemade ones that looked like I’d built them in the dark. What I learned is that the best vent is the one that fits your climate, your coop size, and where your wind comes from. There’s no single magic design, but there are some clear rules that will keep your hens laying steady and breathing easy.
Warm, moist air from the chickens rises. Your vents should give that air a way out up high, while letting fresh air slip in down low without blowing straight on the birds. If the air feels “stale” to you, it’s already too much for them.
Why a good vent for chicken coop matters more than you think
Folks often ask me if they really need to worry about ventilation since chickens are “just birds.” I tell them this: hens are tough, but they breathe that coop air all night, every night. If you wouldn’t want to sleep in there, they shouldn’t either. A proper vent for chicken coop protects them in four main ways.
1. Controlling moisture and ammonia
Chickens breathe out moisture and drop wet manure. Add in a waterer that occasionally drips and you’ve got a damp little box if air can’t escape. That damp air settles into the bedding, into the walls, and into their lungs.
When manure breaks down, it releases ammonia. You might notice it as that “barnyard sting” in your nose or eyes. If you smell it at all, your birds have been breathing it for hours. Good vents at the top of the coop let that warm, moist, ammonia‑laden air rise and leave instead of swirling around your hens’ heads all night.
2. Keeping combs and toes safe in winter
Funny thing: people think closing vents in winter will keep their birds warmer. Truth is, a tight, damp coop is how you get frostbite. I’ve seen birds in a sealed-up coop with blackened comb tips, while birds in a well‑ventilated coop right next door looked just fine.
It’s not just cold that causes frostbite; it’s cold plus moisture. When that moisture from their breath condenses on combs and wattles, it freezes. A well‑placed vent for chicken coop, high on the wall and above roost level, pulls that moist air out so birds stay dry, even if it’s cold.
3. Cutting heat stress in summer
A hen can handle a chilly night better than a hot, still afternoon. In summer, a coop with poor ventilation turns into a little oven. I’ve walked into coops where my glasses fogged up in July. That’s not just uncomfortable for the birds; that’s dangerous.
When I expect a heat wave, I double‑check every vent, open any adjustable ones wide, and make sure there’s a good path for hot air to escape high and fresh air to slip in low. Some afternoons I’ll stand inside the coop, shut the door for a minute, and just feel the air. If it’s stuffy for me, I know it’s time to improve the vents.
4. Better egg production and calmer birds
Birds that breathe clean, dry air stay healthier, lay better, and fight less. Poor air can stress their bodies, making them more likely to pick at each other, slow down on laying, or get respiratory problems. You may not always connect that back to ventilation, but often that’s where the trouble starts.
Types of vent for chicken coop I’ve used
Not every coop needs the same setup, but it helps to know the common kinds of vents you’ll run into when you’re planning or upgrading. Here’s how I think about the main types, from the point of view of someone who has to feed birds before dawn in January.
Fixed gable vents
These are the triangle‑shaped vents you often see near the peak of a roof on each end of the coop. I like them because they sit high, right where the warm, moist air wants to go anyway. They are simple, with no moving parts to break when it’s ten degrees and you’d rather be inside.
- Good for steady air exchange year‑round.
- Stay above roost height, so they don’t blow on the birds.
- Need solid hardware cloth behind them to keep out raccoons and weasels.
Adjustable side vents
These vents open and close like a little window. Some slide; some hinge. I use them mainly on the long side walls of the coop, above the roosts. They shine in spring and fall, when the weather can’t make up its mind.
In a cold snap, I’ll close the windward vent most of the way and just crack the leeward side, so air still moves but doesn’t roar through. In summer, I open both and let the coop breathe easy.
Roof vents and ridge vents
When a coop has a higher roof, I really like a vent right at the top. Hot, damp air collects there like steam under a pot lid. Ridge vents or small roof vents give that air a way out, especially helpful in bigger backyard coops.
With any roof vent, I pay close attention to rain and snow. I’d rather add a little overhang or hood and keep the vent open than close it and trap moisture inside.
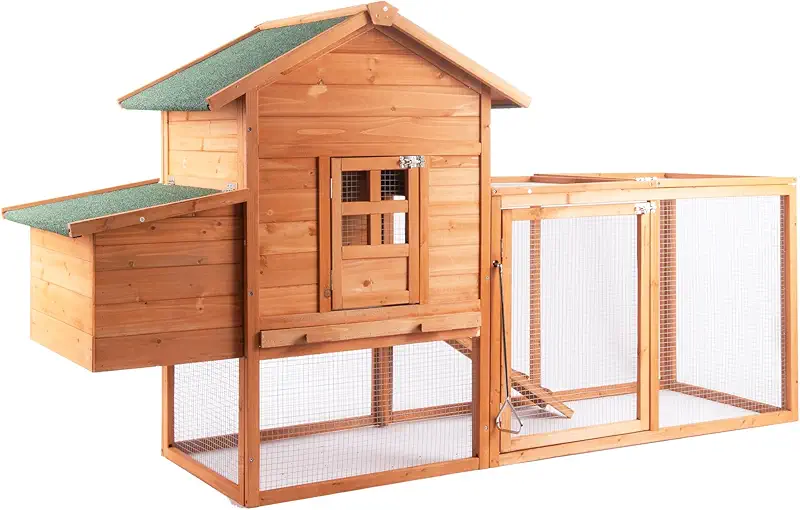

Floor‑level inlets and pop doors
You don’t always need a formal “vent” down low. Sometimes your pop door and a small, protected inlet are enough to bring fresh air in. The key is to keep that low opening out of the birds’ sleeping zone. I aim air so it drifts under or behind the roost, then rises.
In winter, I’ll sometimes hang a little scrap of burlap over a lower opening. It breaks the wind but still lets air slip through. Not fancy, but the hens don’t complain.
Temporary vents and tweaks
On my farm, I’m not too proud to improvise. A board propped open, a small gap above a door, or an added vent panel can make a big difference. The point is to think about where that air is going, not just how big the hole is.
How much ventilation does a coop really need?
Folks like to have a number, so here’s the rule of thumb I use: for a small backyard flock, I aim for at least 1 square foot of vent opening per hen in hot weather, and I keep a good portion of that available even in winter, as long as it’s high and protected from direct wind.
But I don’t stop at numbers. I go by my nose, my eyes, and my breath:
- If I smell ammonia at all, I need more ventilation or drier bedding.
- If the windows fog inside in winter, there’s too much moisture.
- If a candle flame dances wildly near the roost, I’ve got a draft, not just airflow.
- If the coop feels warmer, stuffier, and more humid than outside, air is not moving enough.
One January, I tried closing nearly all the vents on a small coop because the forecast said it would drop to single digits. Next morning, the air inside was warm but wet, and a few hens had pale, frosty tips on their combs. I opened the high vents back up, and the next cold snap they did just fine. Since then, I never trade dry air for a couple of extra degrees of “warmth.”
Placing a vent for chicken coop the smart way
You can buy the best vent on the market and still have a damp coop if you put it in the wrong spot. Position matters. Here’s how I walk through placement when I stand in a new coop.
Think in layers: low in, high out
I picture the coop like a slow chimney. Fresh air comes in low, usually near the floor or below the roost level, and rises as it warms up from the birds. Then it leaves through vents high on the wall or roof. If your main vents sit down at chicken height, you’re blowing air across their backs all night instead of pulling it over their heads.
Stay above roost level for main vents
I like the top edge of my main vents several inches above where the hens roost. That way air can move freely without hitting them straight on. In cold climates, this helps a lot. Birds stay in a pocket of calmer air while the warm, moist air lifts away.
Use the wind, don’t fight it
Every property has a usual wind direction. On my place, it tends to roll from the west. I plan solid walls or small, protected vents on the windward side and more generous vents on the leeward side, where air can be drawn out without blasting in.
Protecting vents from predators and weather
Any vent for chicken coop, no matter how nice it looks, needs one thing behind it: strong hardware cloth, not chicken wire. Chicken wire keeps birds in; it does not keep hungry critters out. I use 1/2‑inch hardware cloth screwed down tight.
On the outside, I like a little roof or hood over wall vents. That keeps rain from driving in and lets me keep vents open more often, which is the whole point. Sometimes a simple overhang does the job just fine.
Matching vents to coop size and flock
A pair of small vents might suit a tiny two‑hen coop, but a flock of eight or ten needs more breathing room. Bigger birds, more manure, more moisture. Don’t be shy about adding another vent if the coop feels stuffy. I’ve never regretted extra ventilation placed high and protected.

Keeping laying hens happy: my daily and seasonal routine
A good vent for chicken coop is half the job; the other half is paying attention over the seasons. Here’s how I manage ventilation as a working farmer with chores before sunup.
Daily checks with your senses
I like simple habits. Each morning when I open the coop:
- I take one deep breath inside the door. If it smells sharp or heavy, I know something’s off.
- I glance at the bedding surface. If it looks damp or dark in patches, I stir or add fresh material.
- I listen for coughing, wheezing, or rattly breathing from any bird.
At lock‑up in the evening, I step inside for a quick look around. No strong smell, no condensation on windows, birds quiet on the roosts—that’s the goal.

Winter routine
In winter, I keep my high vents open almost all the time. If we get a brutal wind, I block the direct gusts but not the airflow. I’d rather wear an extra jacket than seal the birds into a damp box just so I feel better about the temperature.
I use deep bedding in winter, turning it now and then so it stays dry on top. Ventilation and good bedding work together. If you only fix one and ignore the other, the coop will tell on you.
Summer routine
In summer, everything opens up. I use every vent I’ve got, and sometimes I’ll crack the pop door a bit wider at night if predators are well‑fenced out. Shade around the coop and steady air movement inside is what keeps hens laying through the worst heat.
Choosing a ready‑made vent for chicken coop
If you’re not much for cutting holes and building frames from scratch, there’s nothing wrong with choosing ready‑made vents or even a coop that already has them figured out. When I look at products, I think about these simple things:
- Size and total opening: enough combined area for your flock size.
- Placement options: can it sit high on the wall or near the roof where you really need it?
- Screening: does it come with strong mesh, or will you add hardware cloth yourself?
- Weather protection: louvers, overhangs, or hoods that keep rain and snow from driving in.
- Ease of adjusting: especially handy if your weather swings from hot to cold and back again.
When I compare different designs, I pay close attention to photos from real yards, not just the pretty catalog shots. That’s where you see how vents look after a season of sun, dust, and curious hens.


Don’t rush it. Picture your coop on a bitter January morning and a sticky July afternoon. A good vent for chicken coop should handle both without you climbing out of bed at midnight to fiddle with it.
FAQ about choosing and using a vent for chicken coop
1. Should I close my coop vents in winter to keep the hens warm?
I leave my high vents open all winter. Closing them traps moisture, which leads to frostbite and breathing problems. Instead of shutting everything, block direct drafts at bird level and keep vents above their heads open so steam and ammonia can escape.
2. How do I know if my coop has enough ventilation?
Walk in, shut the door, and stand still for a minute. If the air smells sharp, damp, or heavier than outdoors, you need more airflow. Condensation on windows, strong ammonia smell, or damp bedding are all signs that your vent for chicken coop is not doing enough.
3. Will extra vents make my chickens too cold at night?
Extra vents placed high and out of the birds’ direct path don’t bother them much, even when it’s cold. Chickens handle dry cold better than damp cold with no airflow. The real trouble comes from drafts blowing right across their roosts, not from air moving gently overhead.
4. What mesh should I use behind a vent to keep predators out?
I always use 1/2‑inch hardware cloth fastened firmly with screws and washers or heavy staples. Chicken wire is fine for keeping birds inside a run, but raccoons and other night visitors can tear it or squeeze through weak spots. Treat vents like doors—strong and secure.
5. Can I rely on windows instead of a dedicated vent for chicken coop?
Windows help, especially in warm weather, but I don’t rely on them alone. Windows are often at bird height and need to be closed in storms. I like having permanent high vents that work all year, and then I use windows as a bonus when weather allows.
If you’re ready to look over different designs and see which set‑ups fit your own backyard, take a slow browse through the chicken coops and pay special attention to how each one handles ventilation.
I’ll explore coops now